Time to Node!
If you are experiencing errors running the node on Ubuntu 24.04 or greater, run the following command:
echo "kernel.apparmor_restrict_unprivileged_userns=0" | sudo tee -a /etc/sysctl.conf && sudo sysctl -p
PIN & Secret Phrase
A new window will open with a loading screen. After the node loads for the first time, it will look like this. To secure your node, you need to create a 6-digit PIN.
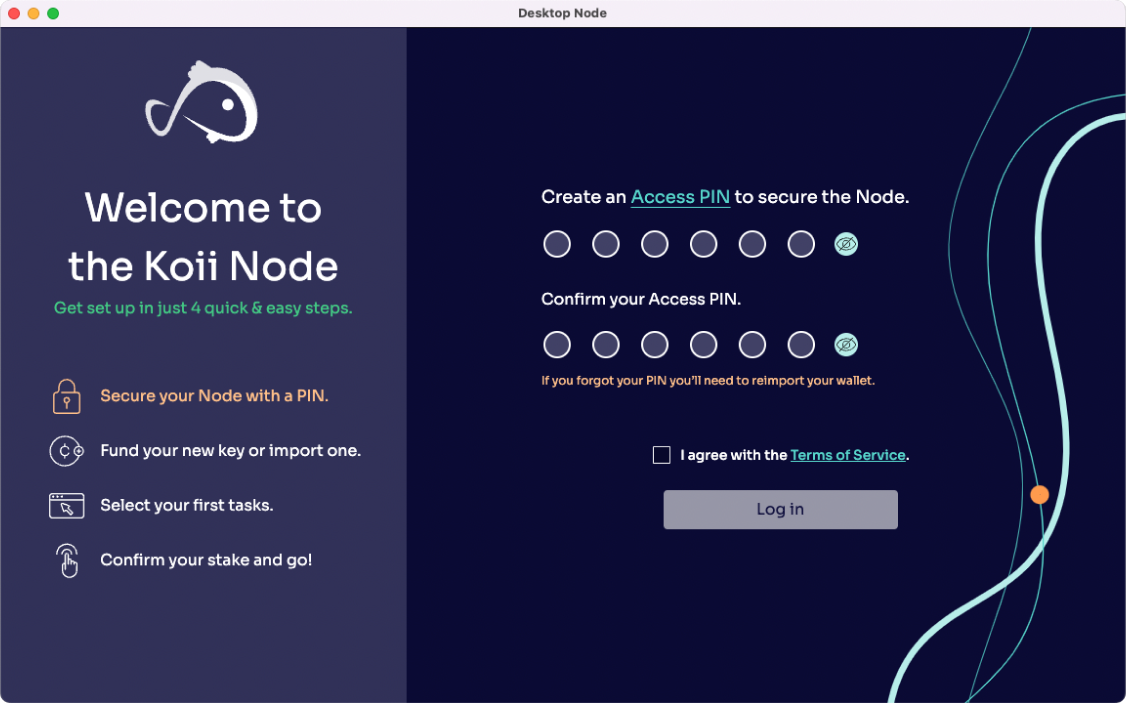
If you forget this PIN, you can access your node again by importing the key via its secret phrase.
After you create a secure 6-digit PIN (probably not 123456 or your birthday), write it down in a secure location and confirm the Access PIN. Accept the Terms of Service and click “Log in”.
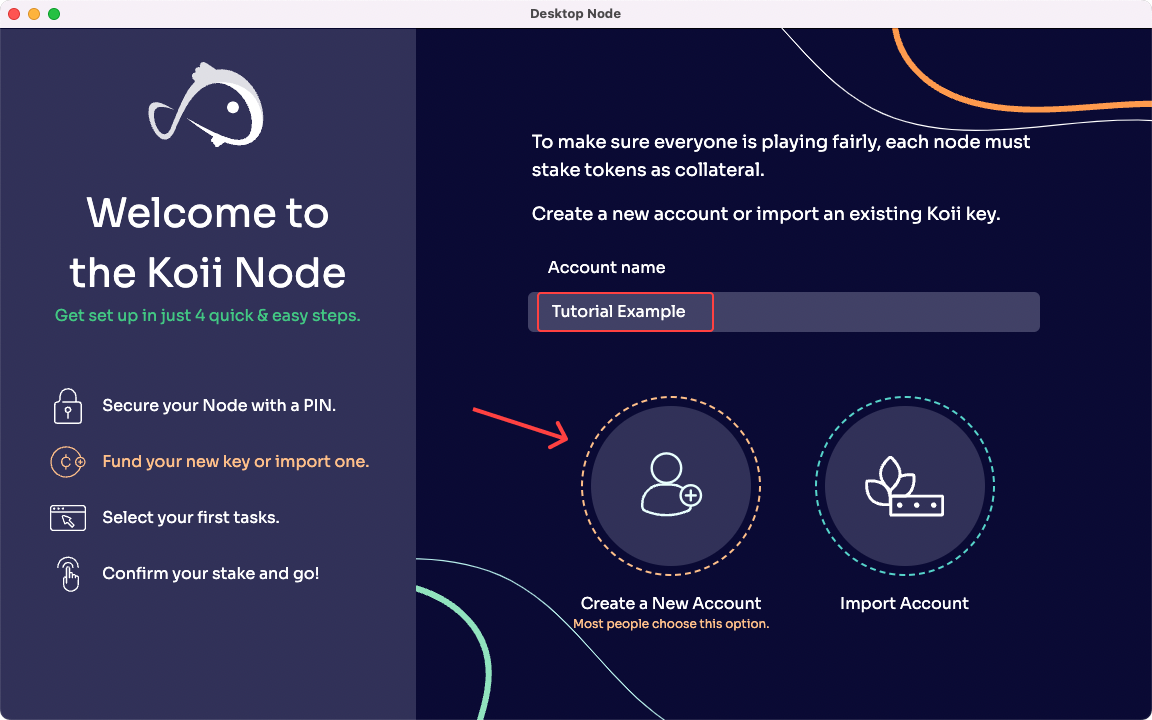
Once your PIN is secured, we will need to create an account.
Name your account. This name can always be changed later in settings, so don’t worry too much about it.
Click “Create a New Account”.
If you’ve already been through this flow and want to use an account or Koii Key you already have, you can import it here instead of using your secret phrase.
Funding your account
Now it’s time to fund your account with a few tokens so you can participate in the task network and earn just for lending your computing power.
If you want to back up your account now, you can (and we recommend it). But you can always do this later. Account backups use a 12-word secret phrase, just like an Ethereum wallet or a Koii key on Finnie.
Remember, secret phrases should always be written using a pen on paper and stored in a safe place. They should never be stored on an internet-connected device like in a notes app, email, or photo. Anyone with access to this secret phrase has full control of your assets.
Free Tokens! (Only for a limited time)
If you’ve been part of the Koii community for a while, you might already have some KOII. If you do, click “copy” at the bottom of the pop-up. That will copy your node’s account address so you can send a few tokens from Finnie.
Right now, three tokens will be enough to run your first task and cover any transaction fees.
Suppose you’re new and don’t have any KOII yet, welcome! We’re thrilled to have you. The “Get My Free Tokens” button will open a browser tab and take you to the KOII faucet. There you can get up to 16 tokens for proving you exist—verifying your email, Twitter, etc.
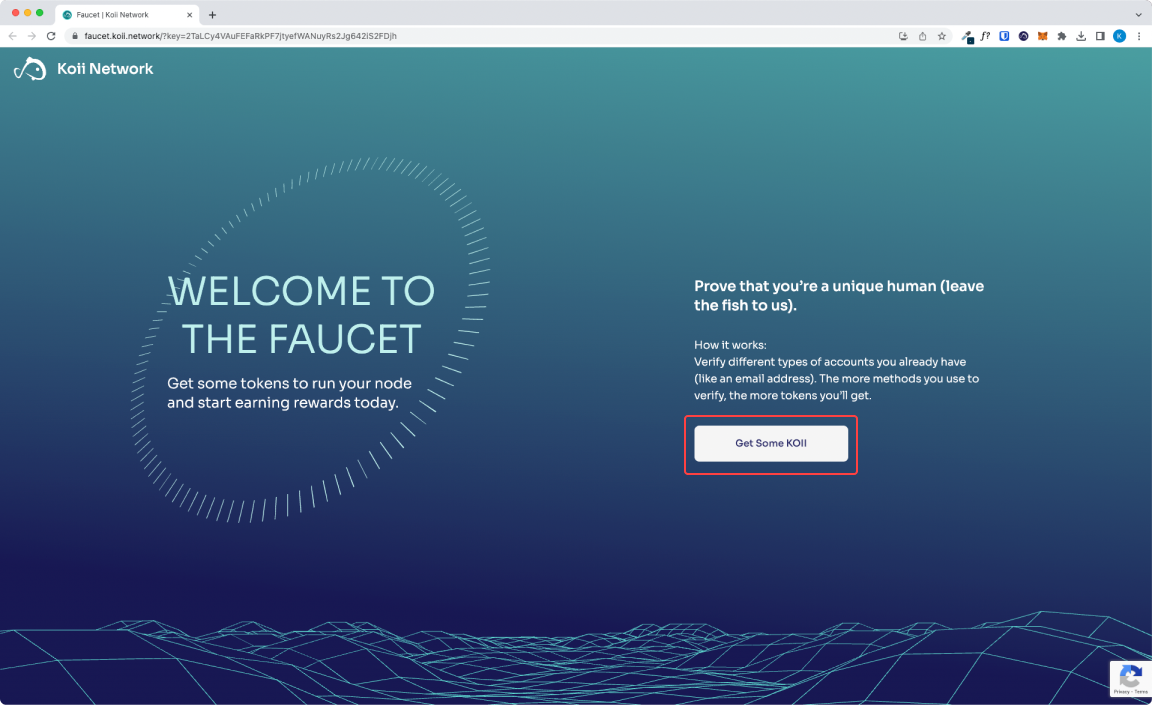
Verifying two methods will give you enough tokens to get started, but the more tokens you have the more you can earn, so verify all four!
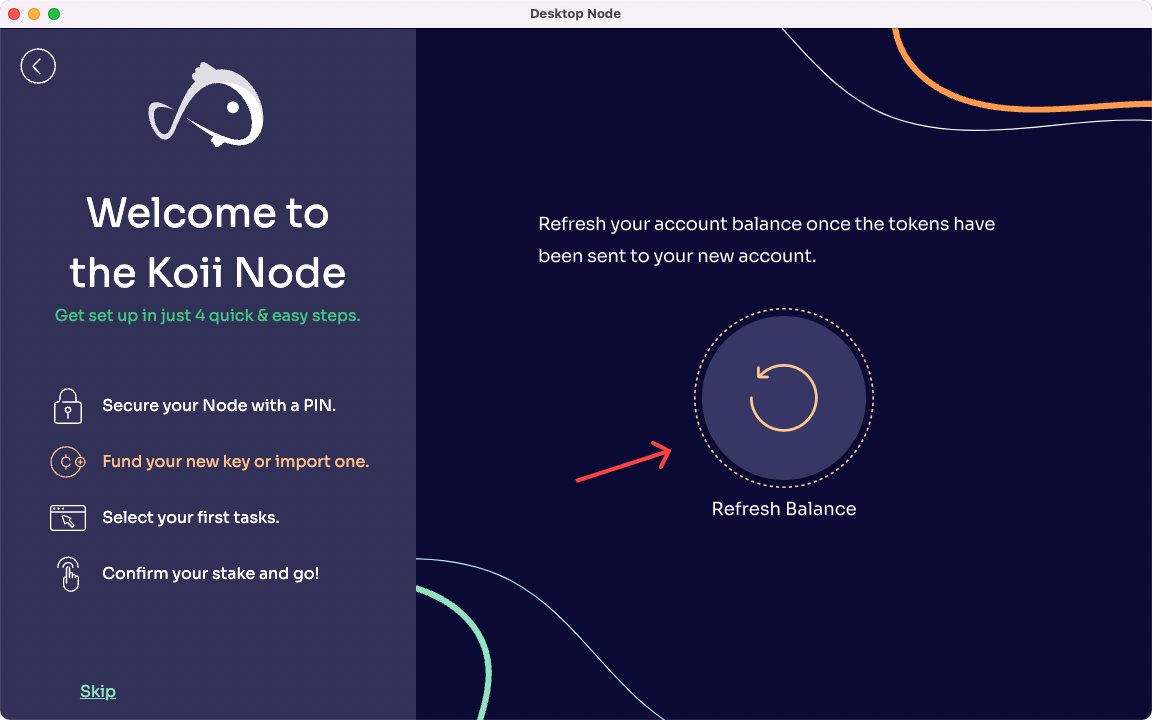
After verifying each method, head back to the Node window. Click the refresh button to tell your node you’ve received the tokens.
Run your first task
After a few seconds, your node will show you the first task to run. To run a task, you must stake some tokens. Each task will have a minimum stake set by the creator.
These tokens serve as a promise to run the task properly. As long as your computer has the right specifications and you don’t alter the submissions, you should never have to worry about losing your stake. Requiring staking is a way to ensure malicious actors can’t disrupt the network.
On this screen, there is one task to run. You’ll see the name of this onboarding task, “I’m a Task. Free Tokens!” the creator address, and a staking entry.
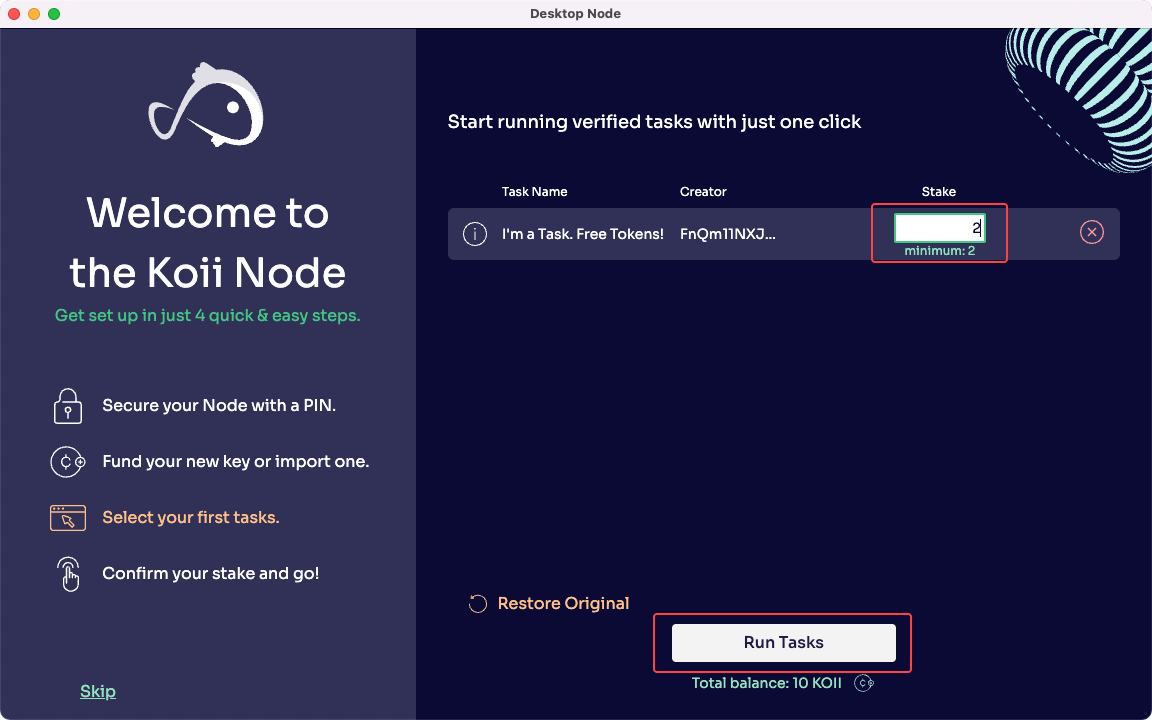
So enter at least 2 tokens in the staking box, and click “Run Tasks.” The next screen is a quick confirmation.
As mentioned above, the reason to stake on a Task is to make sure everyone plays fairly. To make sure this works, there are three different rounds that each task completes in cycles:
- Execute
- Audit
- Reward Distribution
You can learn more about how this works in the documentation here.
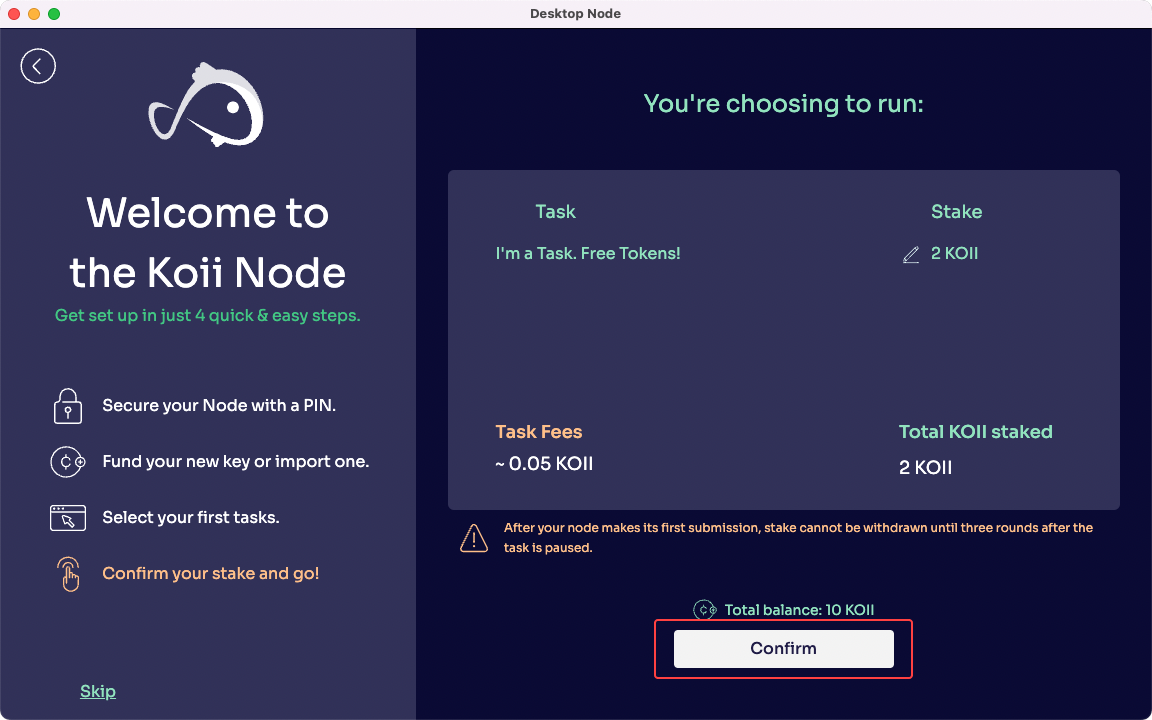
That said, if you participate in the execution stage of a task, you must remain staked until after the reward distribution for that round. So your stake will be locked for up to three rounds after you stop that task.
Once you’re ready, click “Confirm” and you’ll be running your first task!
After a few seconds, you’ll see the “My Node” page. This is where you can see all the tasks you are running at any time. If you want to find more tasks to run, check out “Available Tasks.”
For many tasks, all you have to do is enter the minimum stake amount (or more) in the staking box, then click the “Run Task” play button.

Some tasks will require configuring task settings, which includes things like API token so your node can store files on IPFS, or an Ethereum key to bridge data between chains. If a task requires additional settings, the gear icon in the settings column will turn orange to let you know you need to configure those.
You are all set to run your first task. Invite your friends to run a node so they can be part of the revolution - and referral codes are coming soon, so you can earn some tokens when they do!
Jump in the Koii Discord if you have any questions and learn more about writing your own tasks using the power of thousands of computers worldwide!